Do you ever watch those survival shows on TV and wonder how much of it is total bologna? Do you frequently question whether or not you could make it on your own, given nothing but your own two hands and whatever natural resources your environment provides? Do you quietly assess the theoretical probability of you winning the Hunger Games? Yes, yes and most definitely yes? OK, then you are like me. As such, you will think this is cool.
Cordage, or stuff you can tie other stuff up with, may be the most under-appreciated item in your life. No one thinks about what their shoelace does, until it breaks; or how important a belt is, until it shrinks (like mine keep doing somehow, year after year... I swear) or otherwise malfunctions. Before duct tape, people had to think about this kind of thing. Why rope only made it on to the "simple machine" list by being the pulley's little punk sidekick is beyond me, but whatever. We all know it's important, and I'm about to show you how Katniss Everdeen might have made a bowstring had she not dropped a hornet's nest on that one girl.
For starters, you should know that cordage, rope, twine or whatever can be made from just about anything that is long and pliable. The only really difference among the millions of materials you can use to make rope is how well they work. I'm no expert, but it doesn't take a genius to figure out some things make stronger, finer rope than others. Right now, as you're reading this, you could probably grab something that would work: a plastic bag, paper, the raggedy denim fringe hanging from your favorite summer cut-offs, something long and twist-able. That's it.
If your long, twist-able stuff comes in short (which kind of ignores the
long aspect of long and pliable) pieces, you may want to start out by twisting two of them together.
Like so:
 |
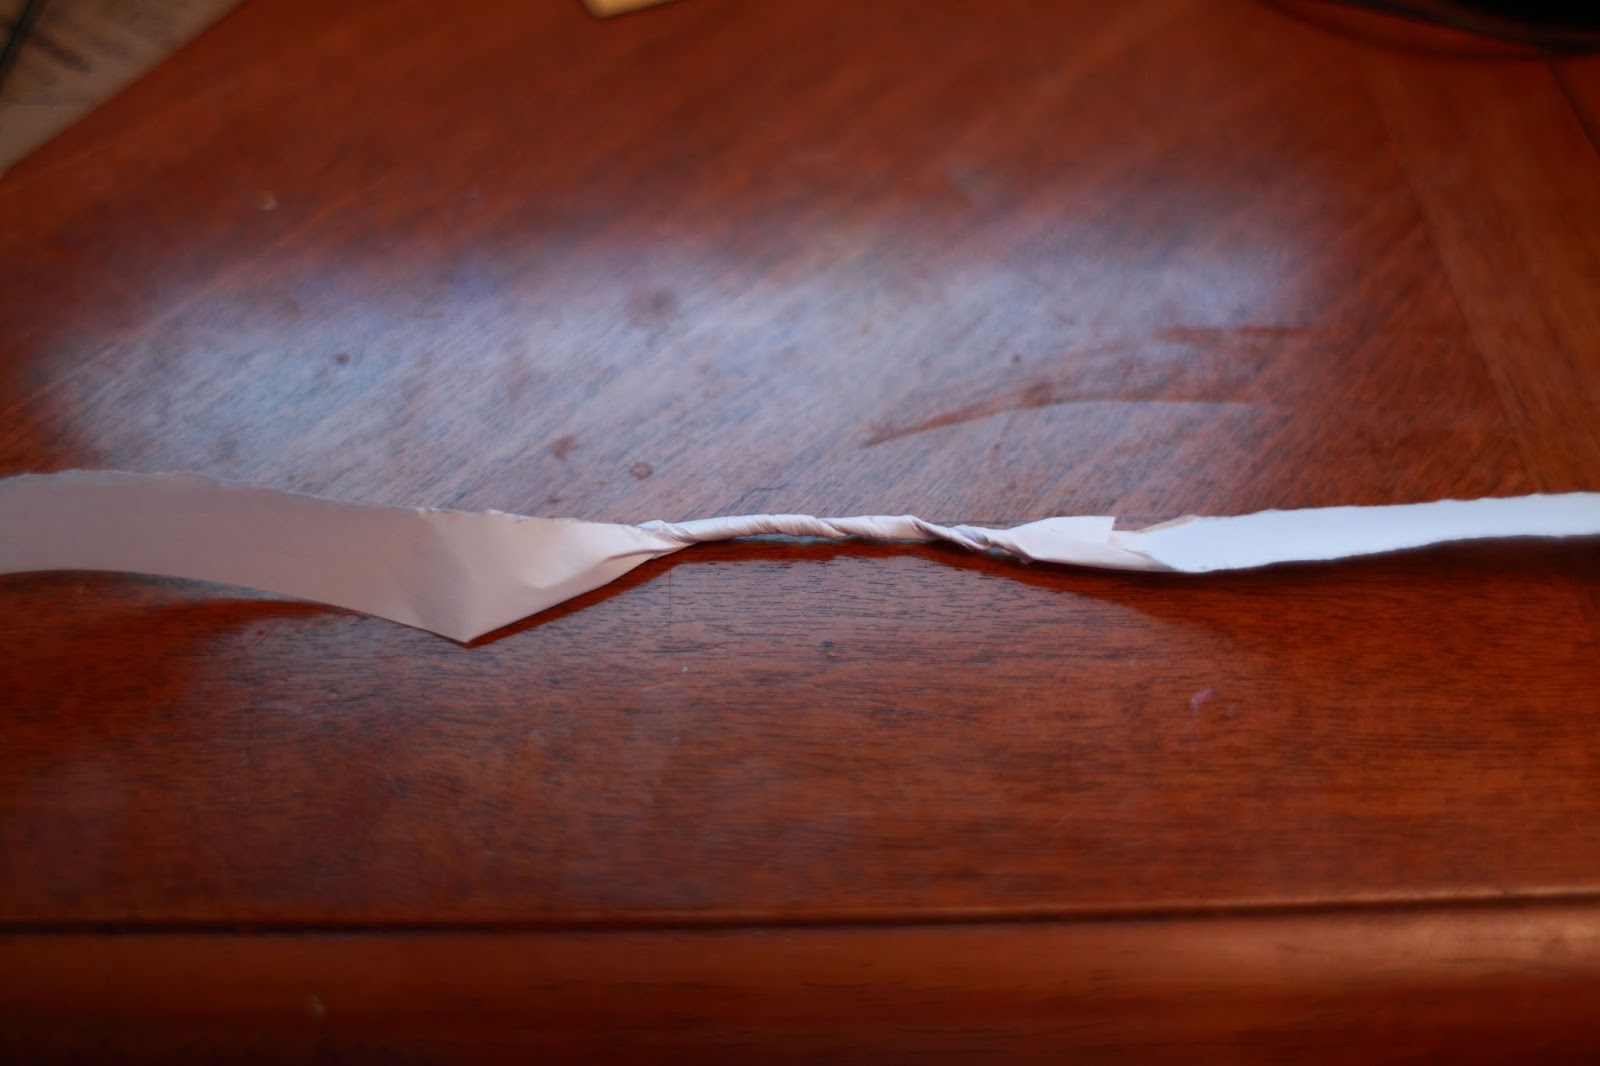
| To illustrate the point that you can use just about anything, and to make it easier for you to follow from home, I'm using two strips I tore from a regular old sheet of computer paper. |
 |
| Overlap the ends a little bit. |
 |
| Twist 'em up. |
 |
| You'll need to watch that you don't just tear the paper apart when you start twisting, but you get the point. Two become one. The part in the middle, where they connect, is a lot stiffer because you have two strips. |
The point is, you need something long enough to get going. If your pieces are already pretty long, you have less work to do and can get started easier.
Whether you started with two separate pieces, or just one really long one, it doesn't really matter. The real job begins here, when you have two pieces (or one, folded to make two) side by side. The whole concept is reverse tension, or something like that, I'm sure there's some fancy scientific term I don't really care about; but it's been the same for thousands of years. The strands
twist one way and
wrap the other. That's really all there is to it, from the handmade stuff to the big factory made ropes.
 |
| OK. Look closely and carefully. The chunky part at the top is where my two strands were twisted into one. It's obviously thicker and stiffer, so it doesn't wrap very well. Once I got down into the thinner strands, it started wrapping nicely. Notice the individual strands (look just above my thumb) each twist in a counter-clockwise fashion. Now, also notice the individual strands are wrapping from left to right, or clockwise, the opposite direction. Tight twists and tight wraps make tight twine, or rope. |
 |
| This is just a tiny little example, but you can see how ordinary paper can be made into something pliable and tough enough to withstand tying and untying. I'm not saying this stuff would be strong enough to tie up the Hulk, but it took a little more effort to snap it than the two little strips of paper would have required on their own. |
I like to have a neat, knot-less loop at the end of my twine (as seen above, sort of), so I start by twisting my long, twist-able stuff until it's tight; similar to the way you used to twist ketchup packets to brink of explosive rupture, you'll be able to tell how tight your material will let you twist. The main "tell" is when you break it. That's a good indicator that you twisted it too tight.
The next step is to fold your twisted stuff in half so that you have
two strands of twisted stuff side by side. Keep the strands twisted
tight (this might be tricky at first, but you'll figure it out).
Now wrap the twisted strands around themselves, rotating in a direction
opposite the twist (if your strands are
twisting counter-clockwise,
wrap
clockwise). This way, when the strands try to unravel, they actually
lock themselves in even tighter. If you want to keep the party going,
you simply twist in some more long, twist-able stuff (preferably not
both strands in the same place) to make the strand longer and keep
going.
 |
| Here's some pretty fine twine I twisted up on our porch. I'm using the inner bark fibers from a white oak log that went into the New Jersey fence. I put my loop over a hook on the porch so I could twist and wrap with both hands. I'm twisting the strands between my thumb and forefinger, then passing the strands left to right, changing hands, to keep wrapping them. |
 |
| Same thing. |
 |
| It take a little finesse to make sure you don't have one strand coming straight down, with the other one wrapping around it like a May pole. When that happens, you're only using the strength of the straight strand, making your twine only half as strong. |
 |
| All done. Don't forget to tie it off when you're finished. |
If you do this with two strands, you're making twine. Three or more,
you're making rope, and it's the exact same process, it just gets a
little complicated when you start running out of fingers to twist and
wrap everything (which is why they make machines for this kind of
stuff). Some people will use the palm of their hand to roll the strands
across their thigh, which twists them both in the same direction while
they wind in the
opposite direction using their other hand. You can also take two lengths of twine and treat them as individual strands, twisting them up into an even bigger rope. This process can be repeated over and over to make some pretty beefy stuff.
Now
you need to go out and find some real life long, stringy stuff in
nature. As you will see, you can sometimes use the long, stringy inner
bark fibers of certain trees. Some plants are tailor made for this kind
of stuff. Dogbane is a type of milkweed that you probably drive past 100
times a day (it grows in roadside ditches, unmowed medians, etc.), it's
also nick named "Indian Hemp" because it makes awesome rope. The long
stringy fibers just below the skin, or bark of the stalk are easy to
harvest, surprisingly strong and run the length of the plant (maybe 2-3 feet) uninterrupted.
The biggest challenge in finding stuff to use is timing. Tree bark is
loosey-goosey in the late spring when you can peel great strips of it
off almost by accident, but practically super glued on in the winter. Dogbane needs to grow through the summer and mature before you can cut it in the fall.
Everything has it's time, and I have basically told you everything I
know at this point, so now we're on the same playing field. Go do some
research; or better yet, try some different stuff out and tell us, no,
show us how it went. Show
and tell. I want pictures. Gold star for anyone who actually does this.
 |
| This is the log. You can tell it's super green just by looking at the end; obviously, it's just been cut, but the wood almost looks wet, probably because it is. The grey scaly bark peeled off in long strips, as did the thin layer of inner bark, which is kind of like the back side of the outer bark. |
 |
| All these strips zipped off the log like string cheese. |
 |
| Looks kind of like a long strip of paper doesn't it? Think we might be able to make something out of it? |
 |
| I was trying to work the angle so you could see how easily the strips peeled off, and how freakishly uniform they were. |
 |
| The outer bark is laying in the grass. It's way out of focus, but you can kinda see the two strips (see above pic) running straight out to the end of the log. |
 |
| This is what Dogbane looks like. I stole this picture from the internet. It's a pretty unassuming little guy, it usually grows in big patches. In the fall, the leaves die and the stalk turns brown and dry. |
 |
| The stalk is like a straw, you basically just crack it and peel the skin off, it's almost hard to mess it up. Also stole this shot from the internet. |
|
 |
| Again, from the internet, but this guy's doing a really good job showing the difference between the inner bark and outer bark, or the fiber-y, stringy stuff, and the crackle-y brittle stuff. From here on out, it's just twisting and wrapping. You can leave the brittle stuff if you want, it will slough off on its own. |
There you go. My most instructional post to date. I feel like I just finished a book report.
-F.W.


Cool stuff, will have to give this a try!
ReplyDelete