I titled this blog "I Built That" for several reasons -you can read about them if you click on my picture over there- but today, I need to take you to the next level by explaining the I Built That way of life. If it gains enough traction I might be able to spin it into a self-help (or self-
destruction) book, I'll pitch the idea to Oprah.
Last post I had just started the "budget-build", using only materials I had on hand, with the exception of a small roll of cage wire I finished it without having to go out and buy anything. I call this practice "what's in the toolbox?". It works great for building things on a budget, as long as you aren't concerned with certain particulars like matching hinges, hinges that don't have three different colors of old paint on them, hinges that aren't totally homemade out of wood that was lying around the work area, and other stuff like that. The point is, "what's in the toolbox?" is more than a building technique, it's part of the I Built That way of life.
Today, Georgie and I took the I Built That way of life into the kitchen. After Sunday afternoon nap; actually, right smack in the middle of Sunday afternoon nap, Georgie bounced up and down on the bed to remind me that it was time to wake up and make cookies as I had promised him. The problem with blindly throwing out enticing incentives -like, "go take a nap and when you wake up, we'll make cookies!"- to get your kids to do things, is that as they age, they actually start to remember those things. So, being the manly man that I am, I held up my end of the bargain. Now, I know full well there is nothing manly about making cookies, that's where the way of life comes in. We took "what's in the toolbox?", and turned it into "what's in the cupboard?". Instead of following some girly recipe, we made up our own. Bunch of flour, bunch of sugar, bunch of butter, little salt, eggs, mix it up. What could go wrong? Nothing, unless you're the type to get get all hung up on your cookies looking, smelling and tasting like stale biscuits. But hey, it's a way of life, and we built those stale biscuits.
There's no way I'm putting wimpy food pictures on this blog, but I will update you on the past couple days and show you how we slipped the 1,000+ lb "budget-build" into the corner pocket of a tiny backyard.
 |
| Picking up where we left off, you can see that I added the trim piece to the top and ran the saw down using the trim piece as a guide. |
 |
| A little side action to illustrate the point. |
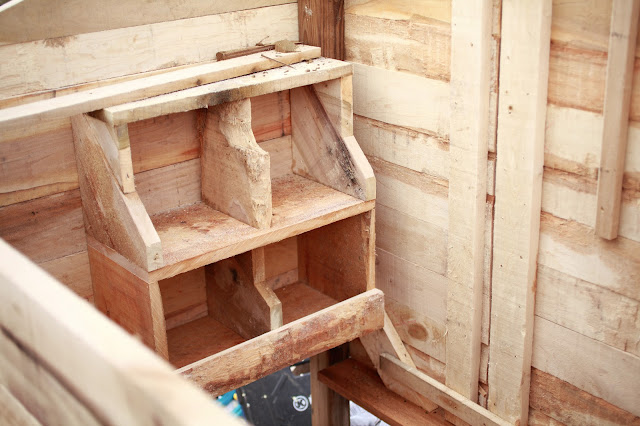 |
| The client wanted four nesting boxes, stacked 2 on 2. So I made that happen. |
 |
| The roof going up, same old story here. The excess gets the business with the circular saw. |
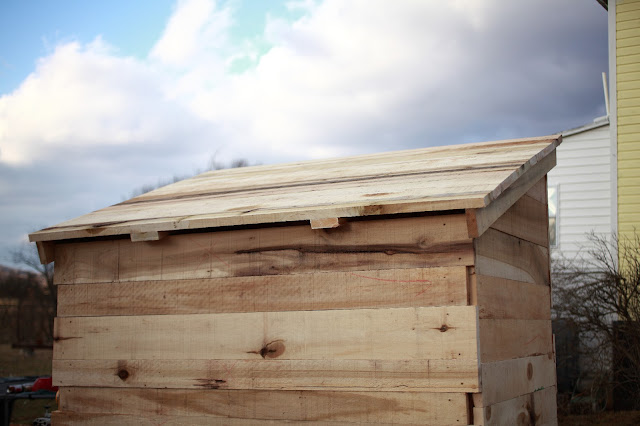 |
| Nice and tidy, ready to be covered. |
 |
| Tar paper goes down first. I only had this one pack of shingles, so I had to make it work. Shingles are usually 3 packs to a square ("square" is roofing talk for 100 square feet), or 33 1/3 sq ft. per pack. The roof was 6 feet by 5 feet, you can do the math. |
 |
| This is where I ran out of shingles, I had to cut the over hang and reuse it to finish the top. I think there was about half a shingle left when I finished! |
 |
| Here's Old Betsy threadin' the needle through these folks' front yard outside of Lexington. The steep, narrow driveway crosses a ditch at the bottom, so there was some trick driving involved. We decided to switch to their Suburban at this point, Old Betsy's 2-wheel-drive was starting to dig up the grass trying to push up hill. |
 |
| We got it through the gate and close to the corner pocket. I rigged up this winch system to pull the coop to the end of the trailer. One person cranks while the other wiggles the back and it scoots right along. |
 |
| At the end of the line, the only thing left to do is Hulk that beast off the end of the trailer. It needed to go back 6 feet and do a 1/8 rotation along the way. |
I need to jump in here between photos to say this next one is the only shot that really features the sweet wooden hinges I made for the front door. Look close. There's a knuckle type of thing on the left with two braces under it and a wooden pin sticking up, then another knuckle on the door side to slide down over the pin. It works and I completely made every part of it from scratch. I told the folks they were my guinea pigs and that I would come replace them with real hinges if anything ever goes wrong.
 |
| We finally said, "forget this mess, let's just push it with the 'burban!" We did, and it was awesome. |
 |
| I had to jump on top of it after we got it in to celebrate our triumph and simultaneously exhibit the rock solid strength of the coop. I mean, if it can hold a slim, trim 160 lb man with a 32 inch waist like me, it's probably pretty stout right!? |
After this last shot, we leveled it out a little and cut through their wire mesh run to make an opening for the door. I wound up leaving the truck and trailer there overnight (luckily we're friends with these folks) and came back to pick them up the next day. I'm happy to say the hens had all roosted on their new poles and laid eggs in their new boxes. On the way home I thought, "I built that, pretty cool.". See ya next time.
-F.W.


This is awesome. I'm loving reading your posts!
ReplyDeleteHey thanks for checking it out! If you steal the cookie recipe give me a shout out.
ReplyDelete